Cursor Setup
Cursor can call FlowAPI through its OpenAI-compatible custom model settings.
Requirements
- A FlowAPI API key from Console > API Keys
- A model ID from the FlowAPI Models page
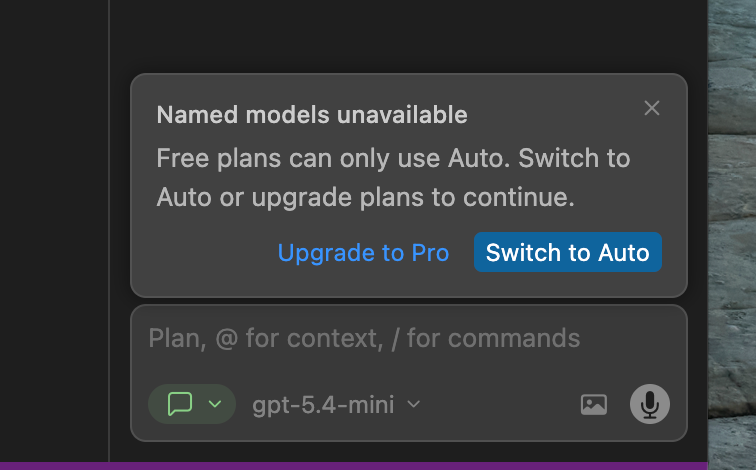
- Cursor Pro, because Cursor custom models require a paid Cursor plan
Configure Cursor
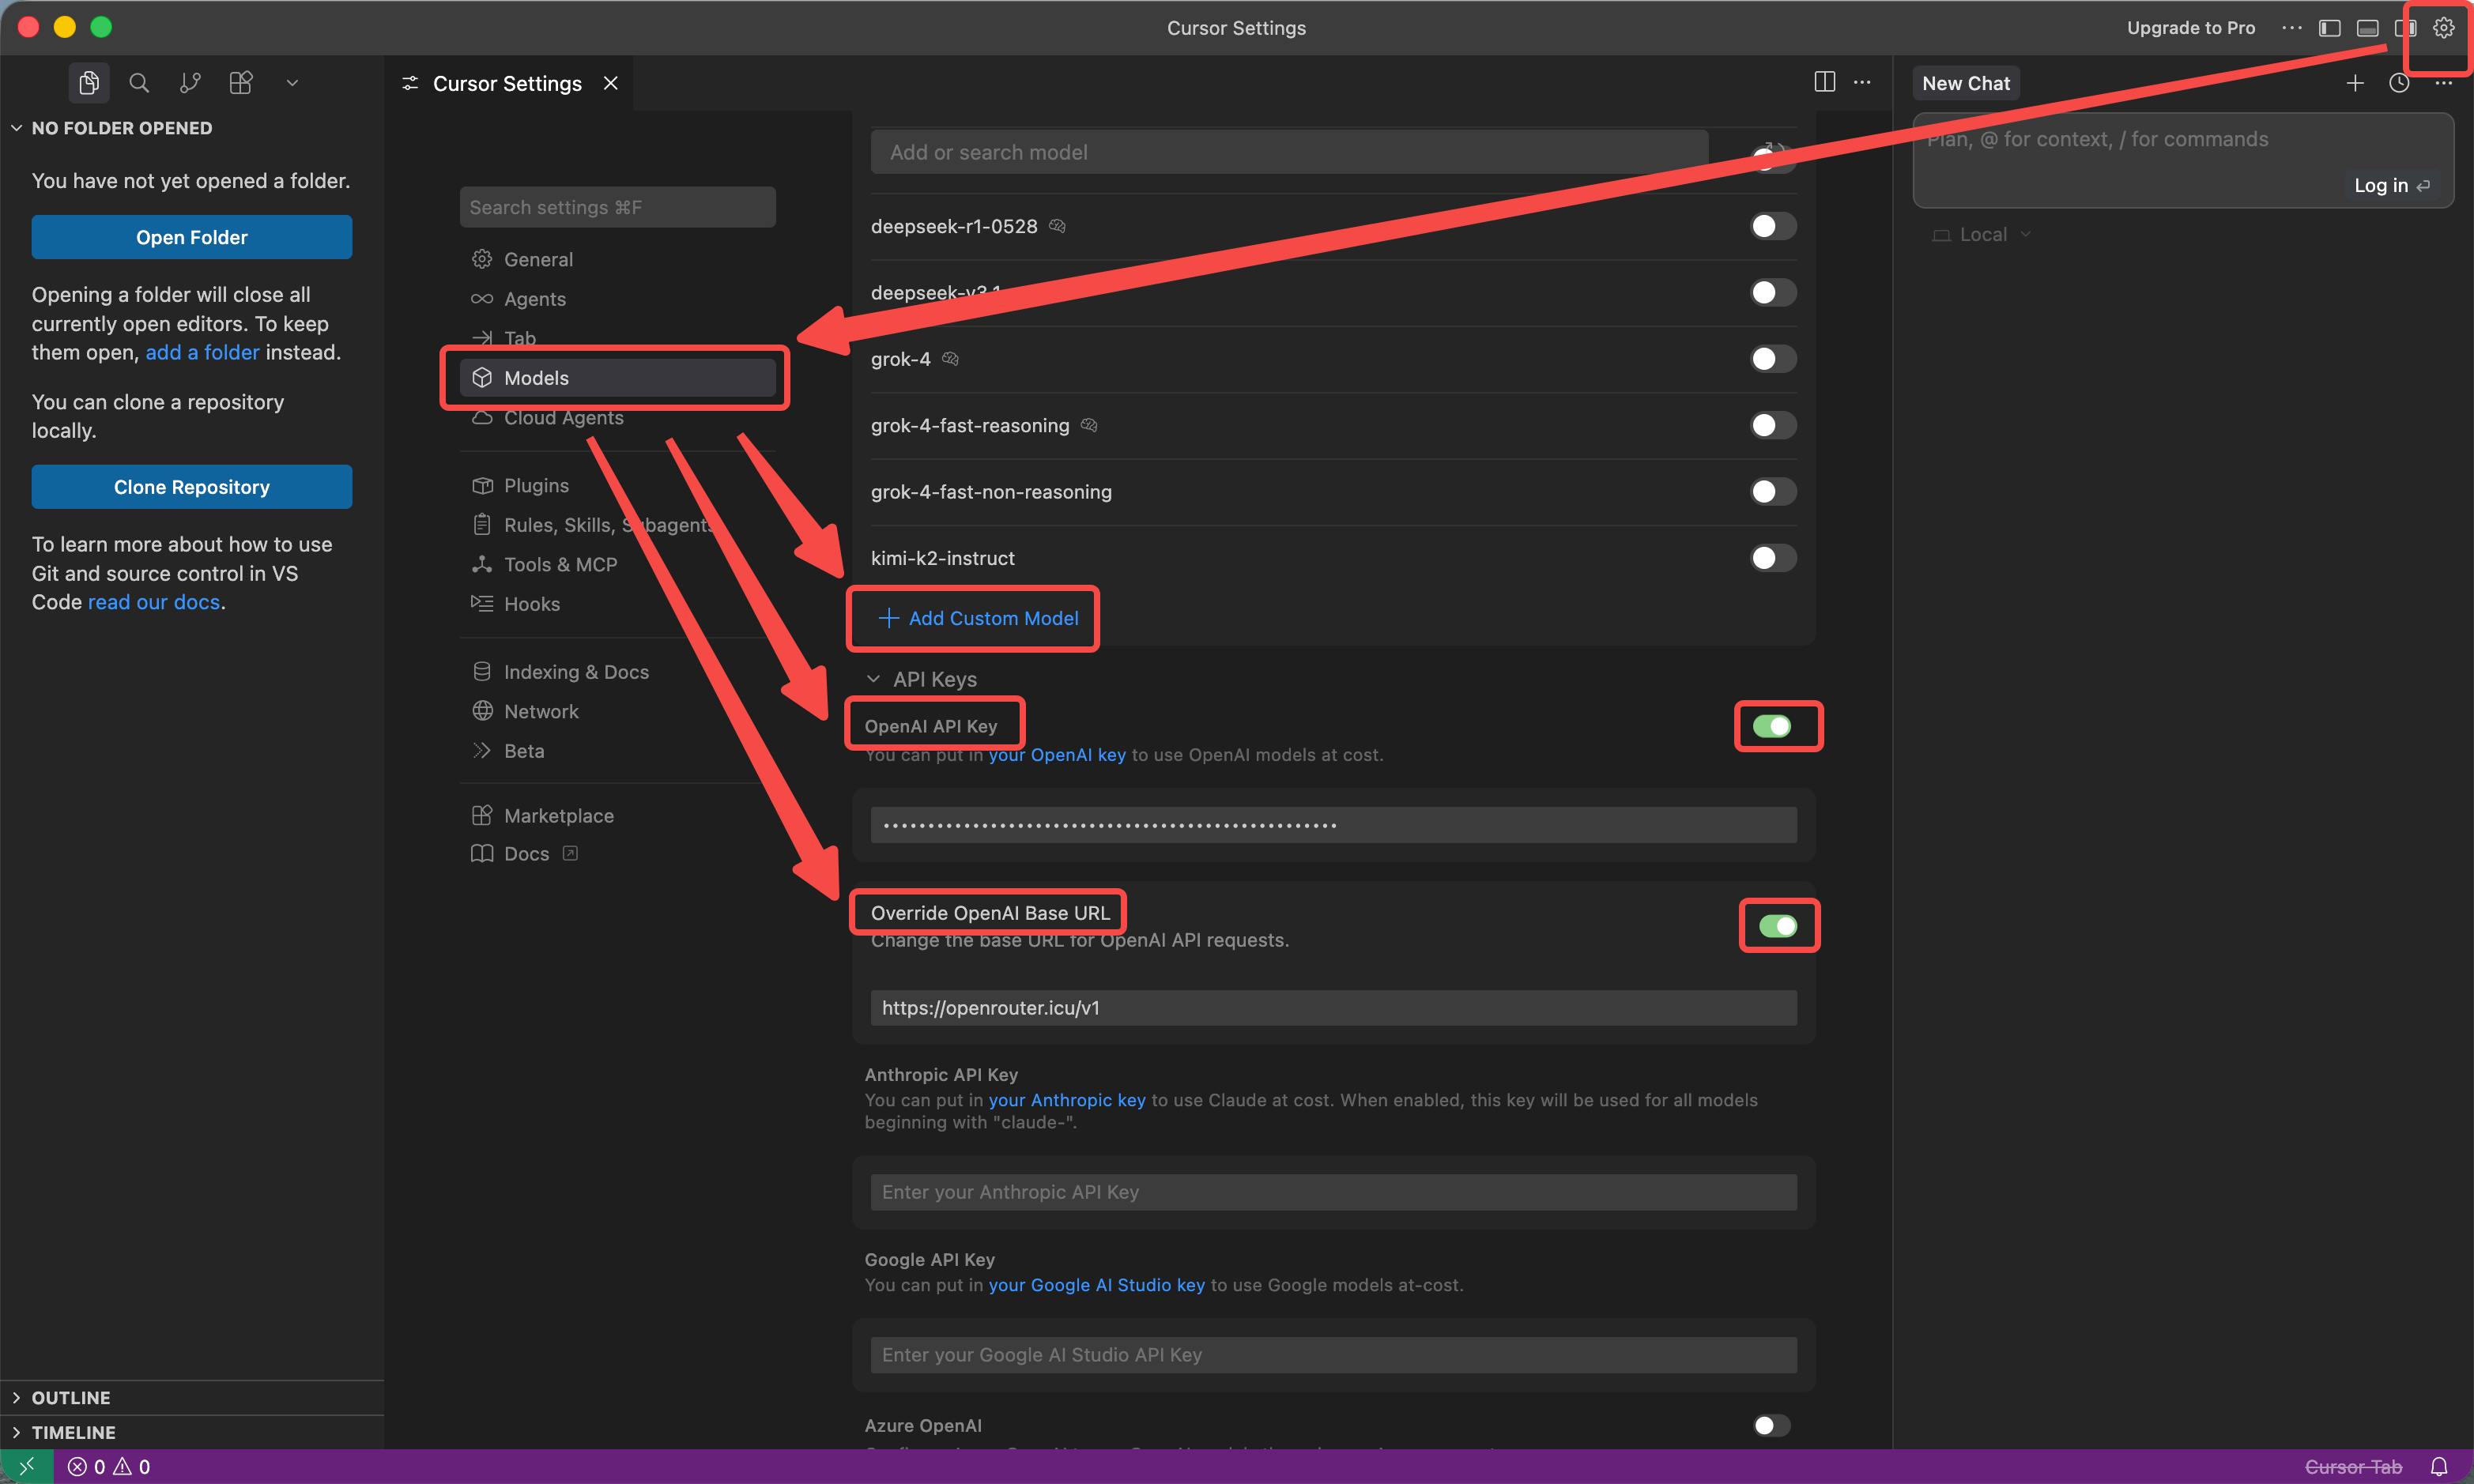
- Open Cursor settings.
- Find the model provider or OpenAI API settings.
- Set the OpenAI-compatible URL to
https://api.flowapi.net/v1. - Paste your FlowAPI API key.
- Click Add Custom Model and enter the exact FlowAPI model ID you want to use.
- Save the settings and start a new chat or agent session.
Cursor’s custom-provider behavior can vary by version. If the key, URL, and model are correct but requests still fail, test the same key with the FlowAPI quickstart first, then retry Cursor after updating to the latest version.
Cursor Pro requirement
Cursor currently requires Pro access for custom model/API configuration. Without that plan, the custom API fields may be unavailable or ignored.
Common mistakes
- Do not use
https://api.flowapi.netin Cursor if the field expects the OpenAI-compatible/v1URL. - Do not invent model aliases. Copy the model ID from FlowAPI.
- Do not paste a key that starts with another provider’s prefix. FlowAPI gateway keys use the FlowAPI key created in your console.
Last updated on